
Mirage is one of the most iconic maps in Counter-Strike 2 (CS2), and mastering the callouts is essential for good team communication. This guide breaks down every callout across A Site, B Site, and Mid on Mirage, so you and your team can stay sharp and win rounds. Let’s dive into the detailed callouts!
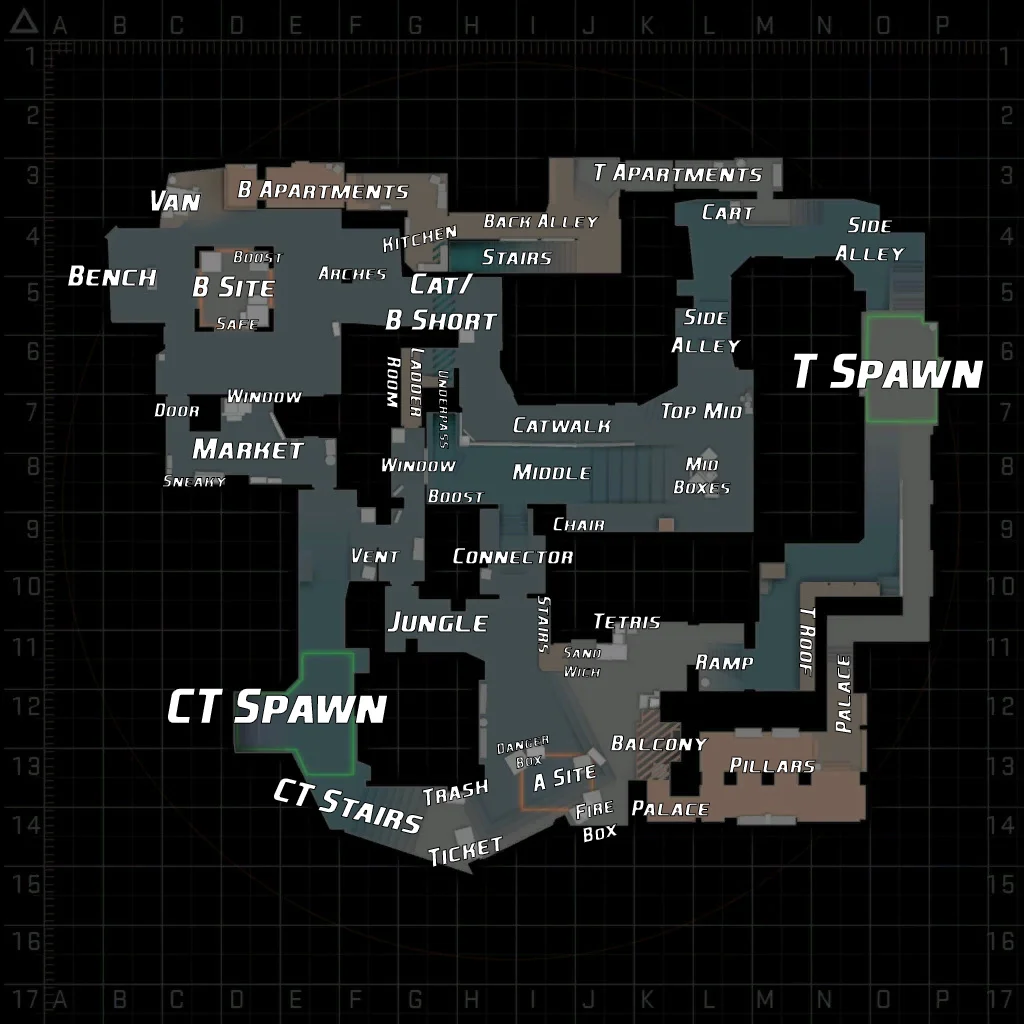
Mirage A Site Callouts
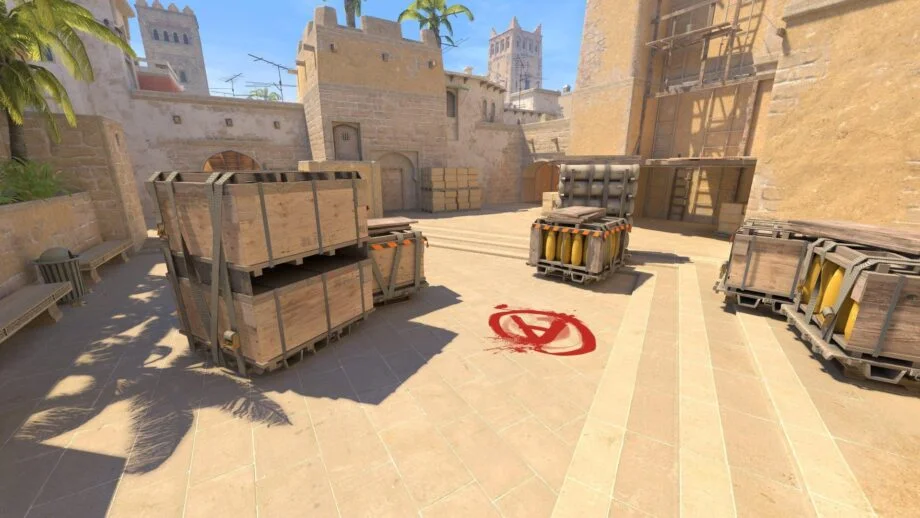
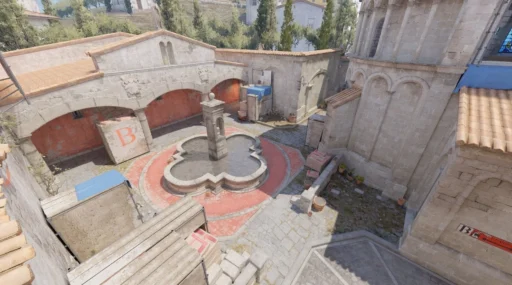
Default
Default is the most common plant spot on A Site where T side can easily take over either by jumping from Palace or entering from Tetris. Smoking CT and Stairs is required to block the vision though.
Firebox
Firebox is a cheeky spot on A Site near Default where a CT player usually hides to surprise the Ts if you go unnoticed.
Tetris
Tetris is the set of boxes located just outside A Site, from where attackers enter the A site to initiate the push.
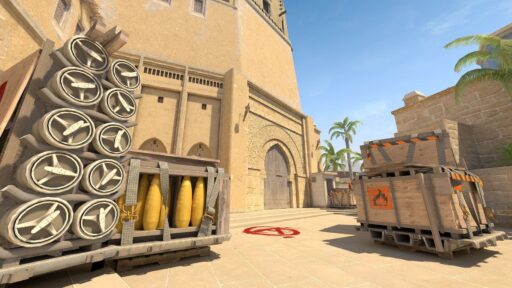
Palace
Palace is the elevated room located just above A Site. It gives attackers a direct view of the site, and it’s where many pushes and lurk plays come from. Usually, one T player will stay there for post plant to defend the site.
A Ramp
A Ramp is the slope leading down to A Site from the T Spawn area. It is a common spot for attackers to set up, throw utility, or rush onto the site. Controlling Ramp is crucial for both attackers and defenders.
Ninja
Ninja is the sneaky corner on A Site between Default and Firebox. It’s called Ninja because it’s often used by players trying to stay hidden and defuse the bomb unnoticed or surprise the enemy when they push the site.
Ticket Booth
Ticket Booth is the elevated area near CT Spawn that overlooks A Site. It’s a key defensive position, as it provides a vantage point for defenders rotating from CT Spawn and holding A Site.
Stairs
Stairs is the location near A Site that leads up from Jungle. It’s an important spot for defenders to hold, as it provides a powerful angle to watch the bombsite and jungle area.
Jungle
Jungle is the area connecting Mid and A Site. It’s a small room that offers defenders or attackers a route to rotate between areas. Keeping control of Jungle helps you cover multiple positions quickly.
CT Spawn
CT Spawn is where the Counter-Terrorists start the round and where they often rotate through when heading to A Site. It’s a crucial spot for defenders trying to retake the site or hold it from an enemy push.
Triple Boxes
Triple Boxes are the stack of three boxes located near Default. It offers solid cover and is a common spot for defenders to hold or for attackers to hide after planting the bomb.
Further read: M4A4 vs. M4A1 Difference in CS2
Mirage Mid Callouts
Mid
Mid is the central part of Mirage that links A Site, B Site, and T Spawn together. Control of Mid is often the key to success on this map because it offers multiple pathways to either site. Holding Mid gives your team a tactical advantage.
Window
Window is the elevated spot overlooking Mid, located near CT Spawn. It’s a powerful control point that allows players to watch Mid or drop into Ladder Room.
Connector
Connector is the pathway linking Mid to A Site. This narrow route is essential for rotating between sites and is often heavily contested in matches.
Catwalk
Catwalk, or simply Cat, runs from Mid to B Site, passing by Ladder Room. It’s an important rotation point, and controlling Catwalk helps you control movement between Mid and B Site.
Ladder Room
Ladder Room is a small area connecting Catwalk and Window, providing access to the upper part of Mid. It’s often used as a defensive spot, especially by CTs rotating to or from B Site.
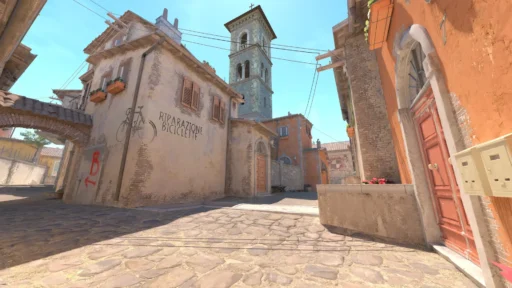
Top Mid
Top Mid is the area near T Spawn that gives attackers access to the central part of Mirage. It’s where T-sided teams often start their Mid control, using smokes and flashes to push forward.
Underpass
Underpass is the lower part of Mid, connecting to T Apartments near B Site. It’s a common flanking route used by attackers to surprise defenders on Mid or even A Site.
Further read: All CS2 Active Maps Pool
Mirage B Site Callouts
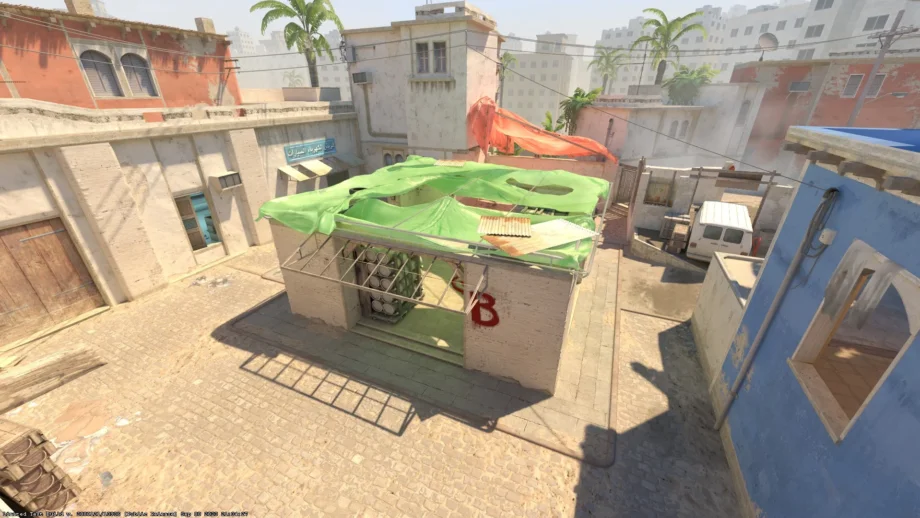
B Site
B Site is located at the opposite end of the map from A Site and is often accessed through T Apartments or Catwalk. It’s the bombsite where attackers aim to plant on the B side of the map.
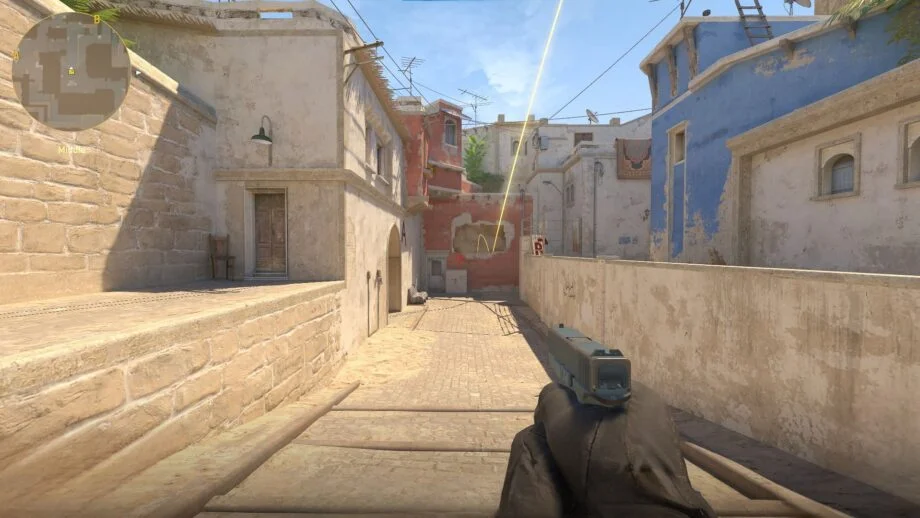
Apartments
Apartments, or “Apps,” is the elevated hallway leading to B Site. It’s a crucial choke point for attackers looking to enter B Site, and holding it is important for defenders.
Bench
Bench is the small area near B Site, right next to the bombsite. It’s often used as cover by both attackers and defenders, and it’s an important spot to be aware of during post-plant situations.
Van
Van is the large vehicle located near B Site. It provides cover and is often used by defenders to hold angles on players entering from Apartments.
Market
Market is the room located next to B Site, accessible from CT Spawn. Defenders typically rotate through Market when trying to retake B Site, and controlling Market is key for holding B Site.
Short
Short is the pathway connecting Mid and B Site via Catwalk. It’s a quick rotation route for defenders and offers a strong position for holding B Site against attackers coming from Mid.
Back Site
Back Site refers to the rear portion of B Site near the wall and bench. It’s often used for planting the bomb in safety, and defending this position is crucial for both attackers and defenders.
Kitchen
Kitchen is part of Market and is located behind B Site. It’s a common entry point for defenders rotating from CT Spawn, and players often throw flashes and smokes from Kitchen to retake B Site.
Further read: CS2 Console Commands Cheat Sheet
Major Changes in CS2 Mirage: Key Updates to Know
CS2 brings several important updates to the Mirage map that will affect how you play. Here’s a breakdown of the most significant changes, categorized by location.
A Site & B Site: Revised Bomb Plant Zones
The bomb plant zones on A Site and B Site have been slightly adjusted. These changes are subtle but can impact bomb placement and site control. Learning these new zones is key to optimizing your strategies.
Mid, A Site & B Site: Updated Smokes and Utility Mechanics
Smokes and utilities now interact with the environment dynamically. Shooting or throwing a grenade through smoke causes it to dissipate temporarily, opening new tactical opportunities, especially in critical areas like Mid, A Site, and B Site.
Entire Map: Improved Visuals and Lighting
Mirage has received a visual overhaul with better lighting, making the map more vibrant and easier to navigate. The improved lighting also enhances visibility, reducing the chance of being surprised by hidden enemies.
Entire Map: Enhanced Sound Design
Sound cues are more precise in CS2, helping you better locate enemies and teammates. This is crucial in Mirage for detecting rotations and rushes, adding more depth to your gameplay.
Various Locations: Minor Map Adjustments
Several spots on Mirage have undergone minor adjustments, such as tweaked cover positions and smoother pathways. These changes, though small, can influence how you approach and control key areas.
Furthermore: How to change crosshair in CS2?
FAQs
Is Mirage CT or T Sided?
Mirage is generally considered to be slightly CT-sided. The map’s layout, with strong defensive positions like Window, Jungle, and B Site, gives Counter-Terrorists an advantage in holding sites and controlling key areas like Mid. However, with good coordination and utility usage, Terrorists can effectively challenge these positions and gain control of the map.
More CS2 Map Callout Guides: