Inferno is one of the most iconic maps in CS2 (Counter-Strike 2). Knowing the callouts on this map is crucial for effective team communication and strategy. This guide will help you understand the importance of callouts, familiarize you with key areas, and provide tips for mastering callouts in CS2 Inferno.
Why Callouts Matter
In CS2 Inferno, callouts are essential for team communication and coordination. Knowing the right callouts can save precious time and help your team react quickly to enemy movements. This is especially important on a map like Inferno, which has many choke points and complex routes.
How Callouts Improve Team Communication
Using callouts effectively ensures that all team members are on the same page. This can prevent confusion and mistakes during critical moments. For example, if a teammate calls out an enemy’s position at “Banana,” everyone knows exactly where to focus their attention.
The Role of Callouts in Strategy
Callouts are not just about communication; they are also a key part of your team’s strategy. By mastering callouts, you can execute complex strategies more efficiently. This can be the difference between winning and losing a round, especially in high-stakes matches.
Understanding and effectively using callouts is crucial for team communication and coordination on CS2 Inferno.
In summary, mastering CS2 Inferno callouts is a fundamental skill that can significantly boost your gameplay. Whether you’re defending a bombsite or planning an attack, knowing the right callouts can make all the difference.
Furthermore: How to change crosshair in CS2?
Key Areas and Callouts on Inferno
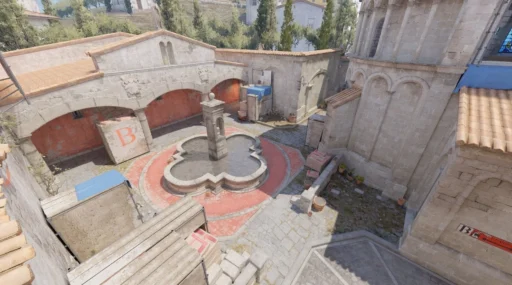
Inferno is a classic bomb defusal map in CS2, set in a picturesque Italian town. Mastering the key areas on this map is crucial for effective communication and strategy. Here, we’ll break down the main sections and their callouts to help you navigate and dominate the game.
Inferno Map Layout
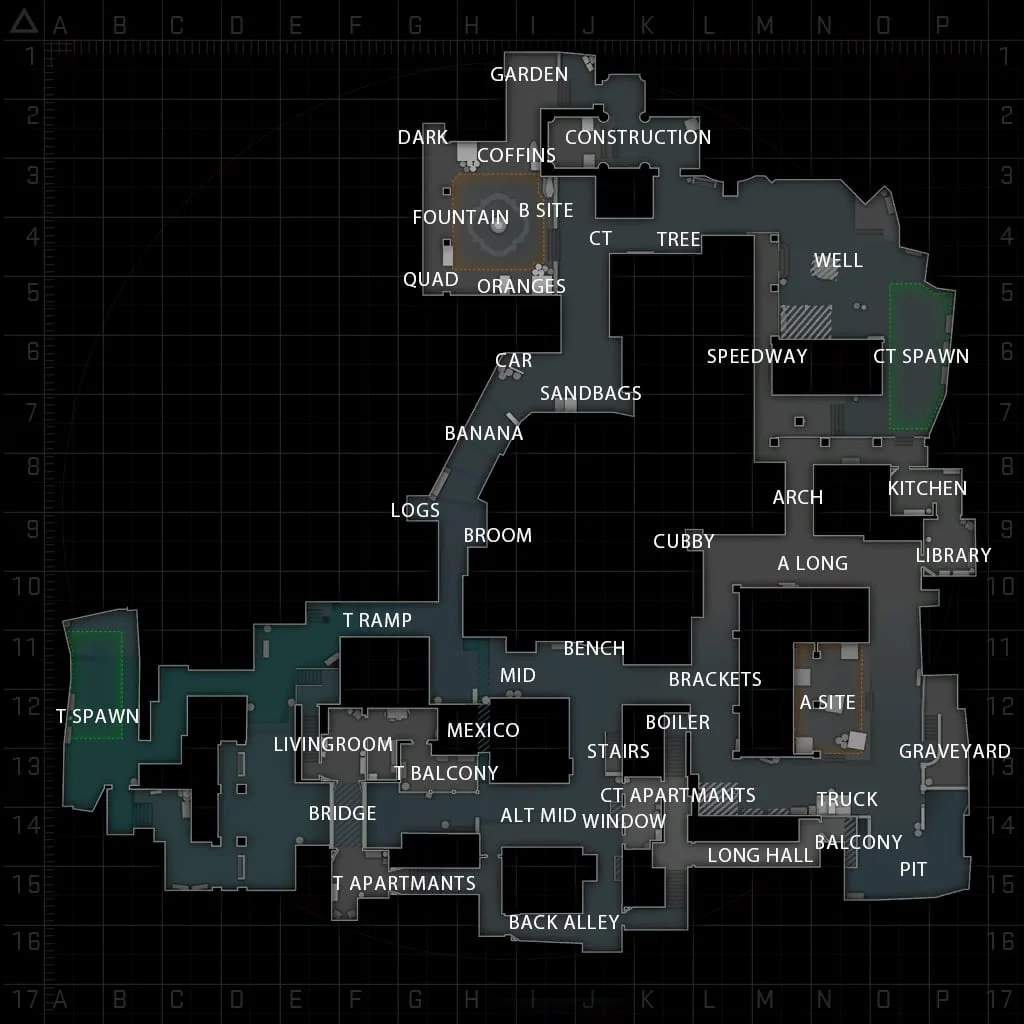
Inferno is divided into several key areas, each with its own strategic importance. The main areas include:
- T Spawn: Where the Terrorists start each round.
- CT Spawn: The starting point for the Counter-Terrorists.
- Mid: The central area that connects to both bomb sites.
- Second Mid: A smaller, parallel path to Mid, offering alternative routes.
- Banana: A narrow pathway leading to Bombsite B.
- Apartments: A complex area with multiple levels and rooms, leading to Bombsite A.
Detailed Callouts for Each Section
Understanding the specific callouts within these main areas can give you a significant advantage. Here are some detailed callouts:
- T Ramp: The ramp leading from T Spawn towards Mid.
- Top Mid: The upper part of Mid, often a contested area.
- Boiler Room: A small room connecting Second Mid to Top Mid.
- Arch Side: The area near the arches, providing access to Bombsite A.
- Truck Side: The side of Bombsite A near the truck.
- Construction: An area near Bombsite B, often used for defensive positions.
Commonly Used Callouts in Inferno
Some callouts are used more frequently due to their strategic importance. Here are a few you should definitely know:
- Pit: A low area near Bombsite A, great for hiding and ambushing.
- Graveyard: Located near Pit, another sneaky spot.
- New Box: A box at Bombsite B, often used for cover.
- Coffins: Another cover spot at Bombsite B, near the bomb plant area.
Knowing these callouts can make or break your game. They help you quickly and efficiently communicate with your team, ensuring everyone is on the same page.
By familiarizing yourself with these key areas and callouts, you’ll be well on your way to mastering Inferno and improving your overall gameplay.
Further read: Best AWP Skins in CS2
Inferno A Site Callouts
Critical Positions on A Site
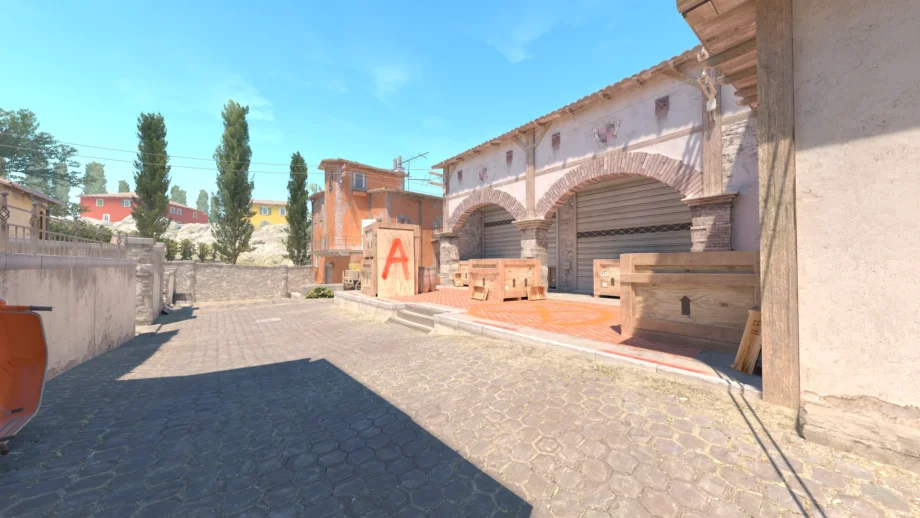
Bombsite A on Inferno is a key area that requires precise callouts for effective gameplay. Knowing these callouts can boost your success on the map. Here are some critical positions:
- A Site: The main platform where the bomb is planted.
- Back Site: One of two corners on A Site, ideal for hiding and defending.
- Close Left: A common spot for defenders to wait for attackers.
- Graveyard: Located opposite A Site, offering cover and a good vantage point.
- Cemetery: Provides a quick rotation and a good view over A.
- Pit: An open area connecting Cemetery and Balcony, challenging to hide in.
- Dosia: Named after a pro player, this spot is great for hiding and throwing grenades.
- Balcony: Offers a good view over A Site but is also exposed to defenders.
- Truck: Used to reach Balcony and cover the entrance from CT Apartments.
- A Short: A shorter passageway leading to Balcony from Mid.
- Patio/Porch: A crucial corner for CTs to camp and wait for Ts rushing from Mid.
- Top Mid: The part of Mid closer to A Site, offering two passageways: Long or Short.
- A Long: The longer route from Mid to A Site, leading to Library.
- Long Corner: Opposite of Patio, used by CTs to control Top Mid and Library.
Inferno Defensive Callouts for CTs
For Counter-Terrorists (CTs), holding Bombsite A involves strategic positioning and communication. Here are some defensive callouts:
- Library: A key spot for CTs to hold and control A Long.
- Arch: Provides a view of Mid and a rotation point to B Site.
- Moto: The area between Arch and A Site, crucial for rotations.
- Cubby: A small corner near A Short, perfect for hiding and surprising attackers.
- Pit: Offers cover and a good vantage point to defend A Site.
- Graveyard: Another excellent spot for holding A Site, providing cover and a good view.
Inferno Offensive Callouts for Ts
Terrorists (Ts) need to be aware of key positions to effectively take Bombsite A. Here are some offensive callouts:
- T Ramp: The starting point for Ts, leading to Mid and A Site.
- Second Mid: An alternative route to A Site, offering different angles of attack.
- Boiler: A room near Mid, providing a good position to push A Short.
- Apps: The apartments area, leading to Balcony and A Site.
- Balcony: A crucial spot for Ts to jump down and take A Site.
- Top Mid: The main area to control before pushing A Site.
- A Short: A shorter route to A Site, often used for quick pushes.
- A Long: The longer route, providing a safer but slower approach to A Site.
Mastering these callouts is essential for both defending and attacking Bombsite A. Practice them regularly to improve your team’s communication and strategy.
Inferno B Site Callouts

Key Positions on B Site
Bombsite B on Inferno is a crucial area with several important positions. Boost is a key spot for defenders, allowing them to control the entrance from Banana. Another important position is Quad, where defenders can hide behind boxes to protect themselves and the bomb. The Fountain in the center of B Site can also be used strategically, though it’s not always the best spot.
Defensive Callouts for CTs
For Counter-Terrorists, knowing the right callouts can make all the difference. Dark is a hidden corner where defenders can surprise attackers. Coffins is another vital spot, located at the entrance to B from Garden. Defenders can also use Construction and Sand Bags to their advantage, though these spots are less common.
Offensive Callouts for Ts
When attacking B Site, Terrorists need to be aware of several key positions. The main entrance is through Banana, and attackers should be cautious of defenders in Boost and Quad. After planting the bomb, using Garden and Construction can provide cover and strategic advantages. Always check Dark and Coffins for hidden defenders.
Inferno Mid
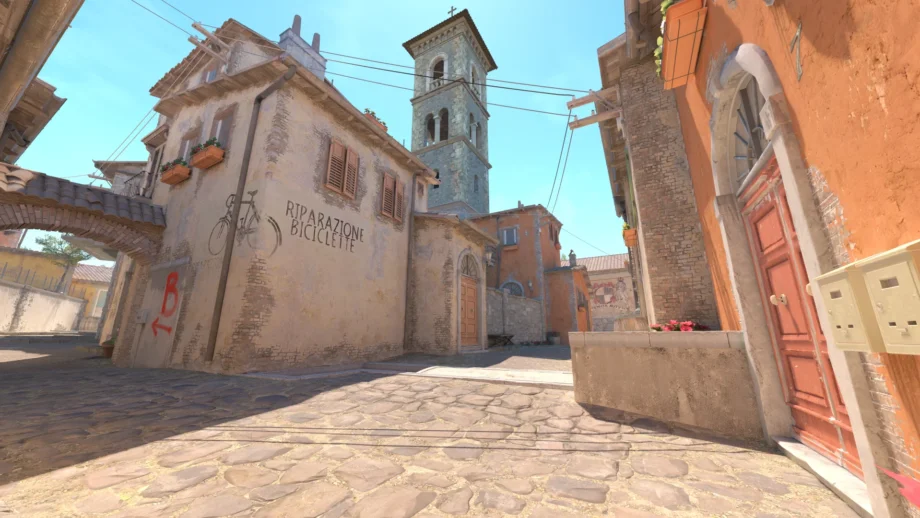
Importance of Mid Control
Controlling the middle area of Inferno is crucial for both teams. Mid control allows for quick rotations and access to both bombsites. It also provides opportunities to catch the enemy off guard. The middle area splits into three main paths: Bottom Mid, Top Mid, and Second Mid. Each path offers unique advantages and challenges.
Callouts for Top Mid and Second Mid
- Top Mid: This is the area that CTs usually hold. It splits into two paths: Arch side and Short side. Controlling Top Mid is essential for pushing towards A site.
- Second Mid: Located between T Apartments and Living Room, Second Mid is a larger area used mainly for fast travel. It connects to various parts of the map, making it a strategic point for both teams.
- Underpass: This underground passage connects Mid with Second Mid. Players often use it to move quickly and avoid open areas.
- Balcony: Extends from Living Room and T Apps, providing a good view of Second Mid.
Strategies for Mid Engagements
- Smoke and Flash: Use smokes and flashes to block enemy vision and create opportunities for your team to push through Mid.
- Split Push: Coordinate with your team to push through both Top Mid and Second Mid simultaneously, overwhelming the enemy.
- Hold Angles: Position players at key spots like Underpass and Balcony to catch enemies off guard.
Mastering Mid control can significantly impact your team’s success on Inferno. Practice these callouts and strategies to gain an edge over your opponents.
Callouts and Tips for CS2 Inferno
Lesser-Known Callouts
While most players are familiar with the main callouts, there are some lesser-known spots that can give you an edge. For example, “Ninja” is a spot on Bombsite A where you can hide and surprise enemies. Another one is “Dark” on Bombsite B, a shadowy corner that can be used for ambushes.
Pro Tips for Effective Communication
Clear communication is key to winning rounds. Always use short and precise callouts. Instead of saying “He’s over there,” say “Enemy at Banana.” This helps your team react faster. Also, make sure to call out enemy positions as soon as you see them.
Common Mistakes to Avoid
One common mistake is using outdated callouts. Maps change over time, and so do the names of certain areas. For example, what used to be called “Library” might now be referred to as “Wine Cellar.” Always stay updated with the latest callouts to avoid confusion.
Practicing callouts regularly can make a big difference in your gameplay. The more you play, the more familiar you’ll become with the map and its callouts.
Remember, consistency is key. The more you practice, the better you’ll get at using callouts effectively.
Practicing and Mastering Inferno Callouts
Effective Practice Techniques
To get better at CS2 Inferno callouts, you need to practice regularly. Success in Counter-Strike 2 is achievable through practice! Start by breaking down the map into main areas like Banana, Mid, and A Long. Focus on these key spots first before moving on to more detailed callouts.
Using Custom Maps for Practice
Custom maps can be a great way to practice callouts. These maps often have labels and markers to help you learn. Spend time on these maps to get familiar with the different callouts and their locations.
Consistency and Repetition
Consistency is key when learning callouts. Play Inferno as much as you can and try to avoid switching to other maps. The more you play, the better you’ll get at remembering the callouts. Repetition will help you and your team communicate more effectively during matches.
The more you play on Inferno, the better you’ll understand which CS2 callouts you should learn next. But the big basic elements are essential to start from.
Conclusion
Mastering the callouts on Inferno in CS2 is a game-changer. It helps you communicate better with your team, making your strategies more effective. While the map might seem complex with its many callouts, consistent practice will make it second nature. Remember, knowing where you and your teammates are at all times can be the difference between winning and losing. So, keep practicing, stay sharp, and soon you’ll navigate Inferno like a pro.
FAQs
Is Inferno CT-sided in CS2?
Inferno has traditionally been considered a slightly CT-sided map, and this trend continues in CS2. The map’s layout, with tight choke points like Banana and Mid, allows Counter-Terrorists to hold defensive positions effectively. However, with good teamwork and utility usage, Terrorists can still break through and secure bomb sites, making it a balanced map overall.
Is Inferno T-sided in CS2?
While Inferno is generally viewed as CT-sided due to its defensive strongholds, it can also favor the T side if players use coordinated strategies and effective utility. Smokes, flashes, and molotovs are crucial for gaining control of key areas like Banana and Mid. A well-executed T-side strategy can turn the tide, making Inferno a map where either side can dominate depending on the team’s coordination and skill level.
What are the key callouts on the A site in CS2 Inferno?
In CS2 Inferno, the A site features several crucial callouts that players need to master, including “Pit,” “Graveyard,” “Balcony,” “Short,” and “Long.” These callouts are essential for effectively communicating enemy positions and planning strategic plays on the A site.
How do I effectively use B site callouts in CS2 Inferno?
B site callouts in CS2 Inferno, such as “Banana,” “New Box,” “CT,” “Coffins,” and “Dark,” help players coordinate their strategies during both attacks and defenses. Using these callouts can improve team communication and increase your chances of successfully securing or defending the B site.
What are the common callouts in the Mid area of CS2 Inferno?
In the Mid area of CS2 Inferno, key callouts include “Top Mid,” “Second Mid,” “Boiler,” “Alt Mid,” and “Mid Ramp.” These callouts are crucial for controlling the middle of the map, enabling rotations, and responding to enemy movements.
Why are CS2 Inferno callouts important for team communication?
CS2 Inferno callouts are essential for clear and effective team communication. They allow players to quickly and accurately describe enemy positions, plan strategies, and execute plays. Understanding and using these callouts can significantly improve your team’s coordination and overall performance in matches.
Can callouts change over time?
Yes, callouts can change, especially if the map is updated or modified. It’s important to stay updated with the latest callouts used by the community and professional players.
More CS2 Map Callout Guides:
